DIY
Doing it myself, and breaking things in the process.

Personally, I'd like to know how to do everything. At least, as it relates to preventing me from having to pay somebody else to do it for me. I find it quite silly that the service-sector of our economy is based around the fact that most people don't know how to do anything.
ARBOR
2017-06-05 15:58:33
by: jovial_cynic
by: jovial_cynic
Last week, a buddy of mine asked me if I could throw together an arbor by the weekend, in time for a video shoot for Penny Palabras. Having never made one before, I told him I could absolutely get it done.

It turns out that garden arbors aren't terribly complicated. It's just the lattice that makes it seem difficult, but you can get a 2'x8' sheet of cedar lattice for about $13 at Home Depot. Cut it to length and sandwich it between a few 2x4 studs and you're good to go.

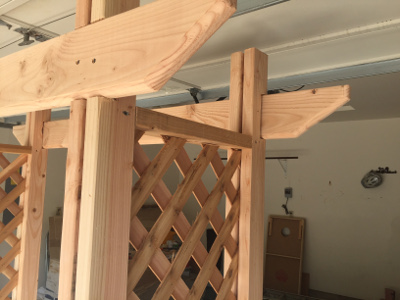
Most of the cutting was done with the miter saw and the circular saw. However, I didn't have an easy way to cut out the spots where the 2x6 horizontal pieces would go, so I did it the old fashioned way: hammer and chisel. It turned out much easier than I thought it would, and the pieces went in quite flush.
Here's a close-up shot where the 2x4s and the 2x6s come together. Without much work, it already looks pretty amazing.
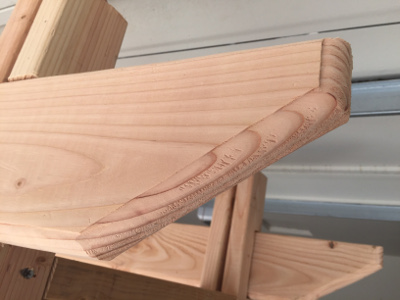
To create an extra dimension to the wood, I used a router bit that I picked up for a couple of bucks at a garage sale. It's nothing fancy, but it adds quite a bit to the wood.
This is before adding a cedar-colored oil coat to the arbor. It's pretty slick how quickly this thing went up.

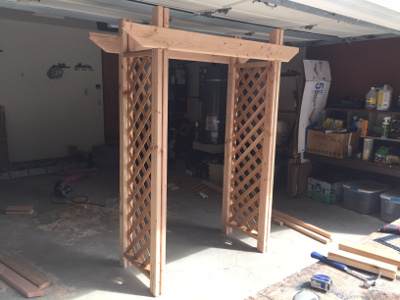
And here is the finished product, with cedar-colored oil, and a few extra slats on top. I sent it off to the location where it'll be used in the videos.
comments [0]
It turns out that garden arbors aren't terribly complicated. It's just the lattice that makes it seem difficult, but you can get a 2'x8' sheet of cedar lattice for about $13 at Home Depot. Cut it to length and sandwich it between a few 2x4 studs and you're good to go.
Most of the cutting was done with the miter saw and the circular saw. However, I didn't have an easy way to cut out the spots where the 2x6 horizontal pieces would go, so I did it the old fashioned way: hammer and chisel. It turned out much easier than I thought it would, and the pieces went in quite flush.
Here's a close-up shot where the 2x4s and the 2x6s come together. Without much work, it already looks pretty amazing.
To create an extra dimension to the wood, I used a router bit that I picked up for a couple of bucks at a garage sale. It's nothing fancy, but it adds quite a bit to the wood.
This is before adding a cedar-colored oil coat to the arbor. It's pretty slick how quickly this thing went up.
And here is the finished product, with cedar-colored oil, and a few extra slats on top. I sent it off to the location where it'll be used in the videos.
comments [0]
DUST ROOM
2017-04-24 21:38:34
by: jovial_cynic
by: jovial_cynic
I've got a small shop at my new place in Washington. Small-ish, anyway. It's big enough for one car, a metalworking space, and a woodworking space. I've been working with wood a lot more lately, including my CNC machine, and I'm constantly trying to keep up with the sawdust and wood particles in the air. It's a mess, really. My poor Datsun 510 is constantly covered in sawdust!
I've decided to partition off a section of my shop for the woodwork by installing walls. Originally, I was going to fully frame out the walls, but my genius wife suggested doing something less permanent.
This is where the CNC machine lives. It's in the back corner of the shop to try to keep the dust it makes as far away from everything as possible. But a small shop can't avoid getting dust all over it unless you wall things off.
In addition to walling off the woodworking area, I thought that having an air filtration system installed would be a very good idea. There's no sense in drowning in sawdust. I've seen many DIY filtration designs, but I figured I'd do it the way a house fan is done: fan on one side of the area with filtered openings on the other side.
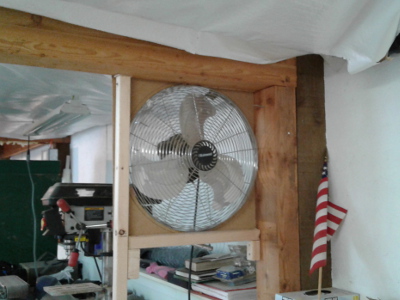
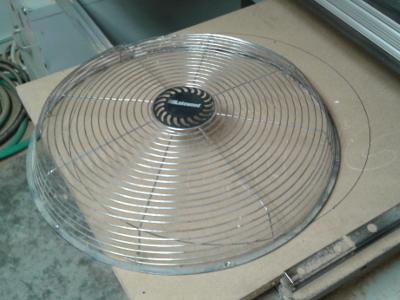
After tracing out the fan housing and building a box for support, I installed the fan on the far corner of the enclosure.
Here's another shot of it.
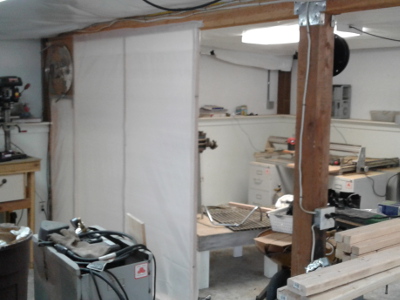
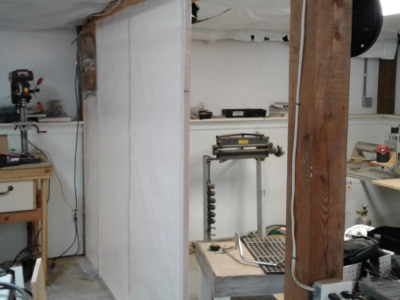
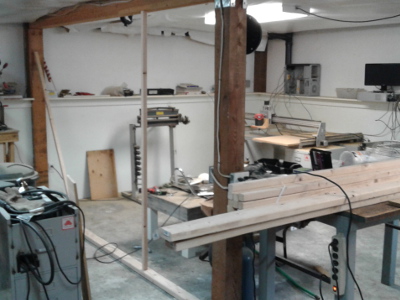
I used some thick clear plastic over some 2x2" studs. Because these walls aren't going to hold anything other than the plastic, I didn't need to bother with proper 2x4" studs or leave 16" (or is it 24"?) spaces between the studs. These 2x2"s are 36" apart and will do serve just fine.

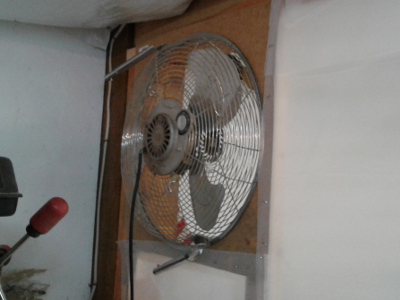
Here's the installation of the filter. Pretty straight forward, but I may end up installing a second one above it. The fan is pretty powerful, and I'm concerned that there's not enough opportunity for the air to escape the room.
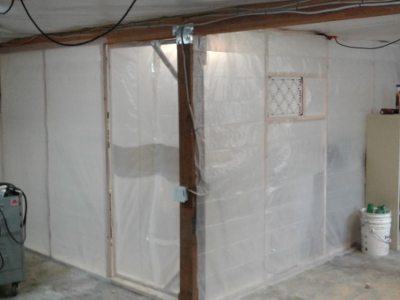
And here's the result. The woodworking room is fully sectioned off in the shop with all the wood tools inside. I have a few spots to seal up so the air only escapes through the filter, but I think this should work!
comments [0]
I've decided to partition off a section of my shop for the woodwork by installing walls. Originally, I was going to fully frame out the walls, but my genius wife suggested doing something less permanent.
This is where the CNC machine lives. It's in the back corner of the shop to try to keep the dust it makes as far away from everything as possible. But a small shop can't avoid getting dust all over it unless you wall things off.
In addition to walling off the woodworking area, I thought that having an air filtration system installed would be a very good idea. There's no sense in drowning in sawdust. I've seen many DIY filtration designs, but I figured I'd do it the way a house fan is done: fan on one side of the area with filtered openings on the other side.
After tracing out the fan housing and building a box for support, I installed the fan on the far corner of the enclosure.
Here's another shot of it.
I used some thick clear plastic over some 2x2" studs. Because these walls aren't going to hold anything other than the plastic, I didn't need to bother with proper 2x4" studs or leave 16" (or is it 24"?) spaces between the studs. These 2x2"s are 36" apart and will do serve just fine.
Here's the installation of the filter. Pretty straight forward, but I may end up installing a second one above it. The fan is pretty powerful, and I'm concerned that there's not enough opportunity for the air to escape the room.
And here's the result. The woodworking room is fully sectioned off in the shop with all the wood tools inside. I have a few spots to seal up so the air only escapes through the filter, but I think this should work!
comments [0]
PANTRY DOOR
2012-04-15 09:05:13
by: jovial_cynic
by: jovial_cynic
My wife and I have been taking on some more home decorating projects. Typically, this involves my wife finding something she likes on Pinterest and having me or her dad buy the parts and build it. This time around, the idea was mine.
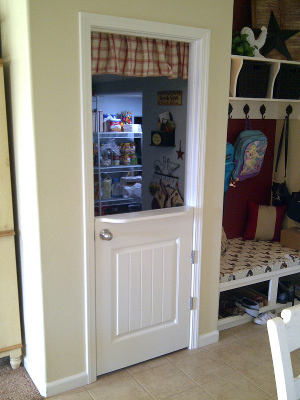
We have a good-sized pantry in our kitchen. It's actually pretty impressive, and it's always been a shame that there's a door that's in the way.
Problem solved.
This project consisted of the following:
1. Cutting the door in half
2. Relocating the top hinge
3. Cutting some 5/8" MDF board for a shelf on the door
4. Mounting the shelf and building a rear support for it
5. Paint
Between the half-door and the short curtain on top, it looks very inviting. I'm pleased with it.
comments [0]
USB RAZOR
2012-01-09 19:49:50
by: jovial_cynic
by: jovial_cynic

This is the first electric razor I've ever owned. It's an old Remington. You know... the old, "as close as a razor or your money back," brand. It hadn't worked in years, but because I have a hard time throwing things away, it sat in a drawer for several years, just waiting for me to come rescue it.
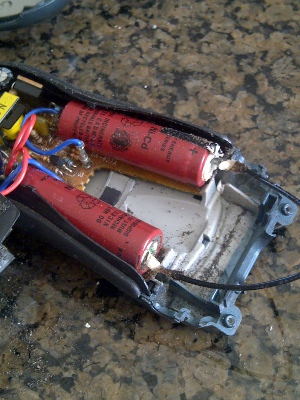
This is a rechargeable model, but long before the razor quit working, it quit charging, forcing me to plug it in every time I wanted to use it. It turns out that these old NiCd AA batteries weren't meant to last forever, so the first order of business was to rip them out and dispose of them (properly). At this juncture, I had a few options - one of which was to simply throw in a set of rechargeable batteries that I had sitting around. However, that would be too easy. And in fact, while testing the motor (bypassing the batteries entirely), I'm pretty sure I toasted the transformer.
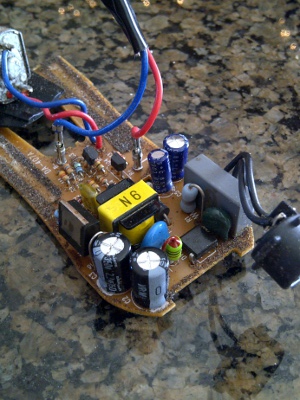
Batteries removed, and knowing that the charging circuit was more than I wanted to deal with, I decided that I'd simply bypass the entire thing and wire a power source directly to the razor motor.
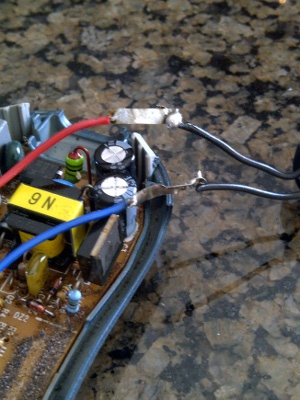
Here's the connection between the power source and the motor.
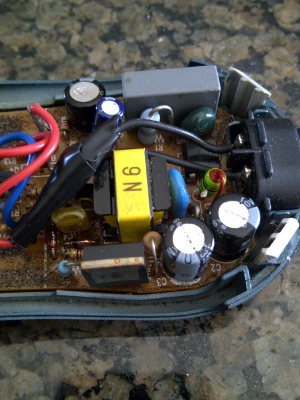
And here's everything connected up. I could have taken the charging circuit out entirely, but that seemed like more work than necessary. So yeah - those are just a bunch of components just taking up space at the bottom of the razor.

My choice of power supply? An extra iPhone USB charger. Alternatively, I could literally plug my razor into any computer and shave... right there in front of the screen.
comments [0]
MORE SHELVES
2010-07-27 20:57:52
by: jovial_cynic
by: jovial_cynic
I've made two more shelves (one in my wife's garage, and two in mine), and I'm really starting to get the hang of it. In fact, with as many new houses as there are in my neighborhood, I'm thinking about going door to door and seeing if people want to buy my services to build custom shelves. Of course, doing it in this 3-digit heat doesn't sound like too much fun.

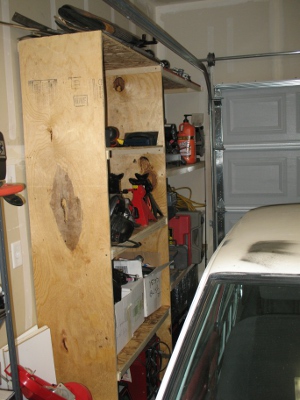
I also decided to try my hand at wall-mounted shelves. I'm using an old bookshelf that we didn't end up assembling after our move, and I like the way it's turning out. I can put regular shelves on the far side of my garage, but the near side has a wall that's nearly flush with the garage door opening, which means I don't have room for shelves to stick out at ground level. The solution is to hang the shelves above the height of my car.
Once this first one is done, I'll post more pictures.
comments [0]
2010-07-24: GARAGE SHELVES 2.0 2009-09-01: NOTHING A LITTLE SOLDER CAN'T FIX 2008-11-29: THE METAL WORKSHOP 2008-11-15: BACK UNDER THE HOUSE 2008-08-24: GARAGE SHELVES 2008-08-15: AND THE KITCHEN SINK 2008-05-19: PLAYHOUSE FOR THE KIDS 2008-03-26: NEW THERMOSTAT 2008-03-11: WATER HEATER ADVENTURE 2008-02-17: DARK ENCLOSED SPACES 2007-12-20: LED MACRO RING LIGHT 2007-08-23: WHIRLPOOL WASHER REPAIR 2007-04-26: CHEAP HEAT 2007-03-20: ICEMAKER 2006-12-09: UTILITY TRAILER UPDATE 2006-12-08: UTILITY TRAILER 2006-11-11: DIY MULTI-MACHINE 2006-10-25: GARBAGE. ALL OF IT. 2006-10-11: JOVIAL_CYNIC VS. TIDE DETERGENT 2006-07-03: RAISE THE ROOF? 2006-06-11: MORE WOOD WORKING 2006-06-10: WOOD WORKING 2006-05-17: LUMBERJACK 2006-04-17: ENERGY CRISIS 2006-03-16: TOILET REPAIR ON THE IDES OF MARCH 2006-02-17: HARDWARE FAILURE

